
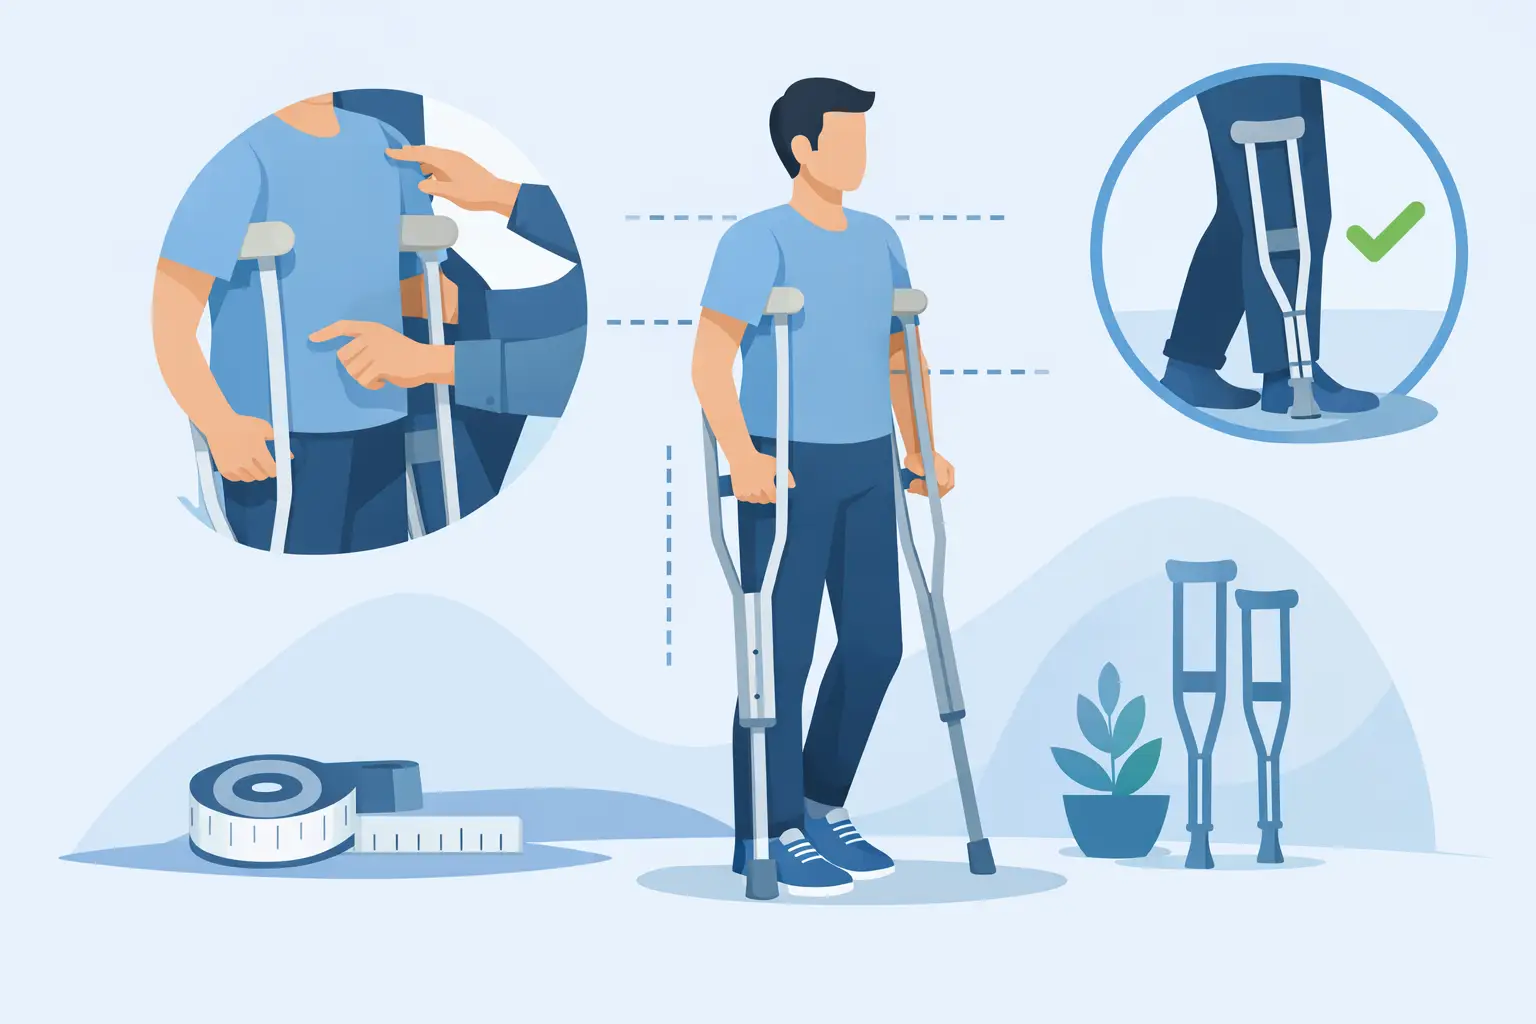
How to Size Crutches Correctly for Safer Walking
A crutch that is only an inch too tall or too short can change how a patient walks, shifts weight, and uses their hands. That is why knowing how to size crutches correctly matters before a patient leaves a facility, begins home recovery, or starts using a new mobility aid. Correct fit supports safer movement while helping reduce avoidable pressure on the underarms, wrists, shoulders, and back.
Crutch sizing should be completed with the patient wearing the shoes they will normally use for walking. A clinician’s fitting instructions, rehabilitation plan, and the crutch manufacturer’s directions should always take priority. If a patient has poor balance, significant weakness, a recent surgery, or a weight-bearing restriction, fitting and gait training should be supervised by a qualified healthcare professional.
How to Size Crutches Correctly Before Use
Most standard underarm crutches have two adjustments: overall height and handgrip height. Both must be set properly. Setting only the overall height may leave the patient reaching too far for the grips or placing excess pressure through the upper body.
Begin on a dry, level surface with the patient standing upright in their regular walking shoes. They should stand naturally, rather than leaning to one side or lifting the shoulders. Position the crutches slightly in front of and beside the feet, as they would be during normal use.
For underarm crutches, the top pad should sit about 1 to 2 inches below the armpit. The patient should not rest body weight on the underarm pads. Weight should be supported through the hands and handgrips. This clearance helps protect the nerves and blood vessels in the underarm area from prolonged pressure.
Next, adjust the handgrips. When the patient holds each grip, the elbow should have a comfortable bend of approximately 15 to 30 degrees. The wrist should be near the level of the hip crease when the arm hangs relaxed at the side. These checks work together: a patient who must shrug to reach the grips, lock the elbows, or bend too deeply needs another adjustment.
After making changes, inspect both crutches. Their height settings must match, the adjustment buttons or pins must be fully engaged, and the handgrips must be level. A loose pin, uneven setting, or damaged rubber tip can make otherwise correct sizing unsafe.
Measure When the Patient Cannot Stand Safely
Standing is the most reliable way to fit crutches, but it is not always possible immediately after injury, surgery, or hospital discharge. A seated or lying measurement can provide a starting point until the patient can be assessed while standing.
For an underarm crutch, measure from the front crease of the armpit to a point roughly 6 inches out from the heel. This measurement estimates the needed overall crutch length. It should be treated as a preliminary setting, not a final fit. Footwear, posture, leg length differences, and upper-body strength can all affect the final adjustment.
Another practical reference is to measure from the armpit to the floor while the patient is lying flat with shoes on, then subtract about 1 to 2 inches for underarm clearance. Once standing is safe, verify the fit using the underarm and elbow-angle checks.
Do not rely on height charts alone. Manufacturer charts can help narrow product selection, especially for pediatric, bariatric, or unusually tall users, but individual fitting remains necessary. A patient with a forward-flexed posture, shoulder limitations, or an orthopedic brace may require an adjusted setup and professional guidance.
Underarm Crutches Versus Forearm Crutches
The correct measurement depends on the style of crutch. Underarm crutches, also called axillary crutches, are commonly used for short-term recovery and temporary non-weight-bearing needs. Their key fit points are the 1- to 2-inch gap beneath the armpit and the slight elbow bend at the handgrips.
Forearm crutches use a cuff around the forearm rather than an underarm pad. They are often selected for longer-term mobility needs because they allow a different pattern of upper-body support and can be easier to manage during certain daily activities. For forearm crutches, set the handgrip so the elbow is bent slightly when standing upright. The cuff should sit securely below the elbow, typically about 1 to 2 inches beneath the elbow crease, without restricting circulation or pinching the arm.
Cuff position varies by product design and patient anatomy. A cuff that is too high may interfere with elbow movement; one that is too low may feel unstable. For a first-time forearm-crutch user, a therapist or mobility professional can confirm both fit and technique.
Signs the Crutches Need to Be Adjusted
A patient may not immediately recognize that their crutches are incorrectly sized. Caregivers and care teams should watch for changes in posture, gait, and reported discomfort during use. The following signs usually warrant a fit check:
- The patient leans heavily into the underarm pads or reports numbness, tingling, or soreness in the underarm area.
- The shoulders are elevated, the elbows are locked, or the patient has to reach down excessively for the grips.
- The patient feels cramped, has to bend too far at the elbows, or cannot place the crutches comfortably beside the body.
- One crutch appears taller than the other, or the patient shifts noticeably to one side while standing.
- The rubber tips are worn, split, loose, or contaminated with debris that could reduce traction.
Hand, wrist, shoulder, or back discomfort can also signal a problem, although it may relate to gait technique, the prescribed weight-bearing status, or a need for a different mobility device. Persistent pain, numbness, falls, or new weakness should be brought to the attention of the patient’s healthcare provider promptly.
Confirm Safe Use After Sizing
Sizing and use are connected. Once crutches are adjusted, the patient should practice the prescribed walking pattern in a clear area before navigating hallways, ramps, thresholds, or stairs. The care team should confirm which leg or foot can bear weight and how much weight is permitted. Instructions differ for non-weight-bearing, toe-touch, partial-weight-bearing, and weight-bearing-as-tolerated recovery plans.
For standard underarm crutches, remind patients to press through their hands rather than their armpits. Keep the crutches close enough to the body to remain controlled, but not so close that the feet strike the crutch tips. Small, deliberate movements are generally safer than long steps, particularly during the first days after discharge.
The environment matters as much as the equipment. Remove loose rugs and electrical cords, maintain clear pathways, provide adequate lighting, and keep frequently used items within reach. Wet floors, pets underfoot, carrying bulky items, and rushing to answer a door or phone are common fall risks. A backpack, crossbody bag, or caregiver assistance may be safer than trying to carry objects while using crutches.
For facilities and homecare teams, inspect crutches between users or before reissuing equipment. Check the frame for bends or cracks, ensure push-button locks engage fully, verify handgrips are secure, and replace worn tips. Tip wear is often overlooked, yet it directly affects traction on tile, vinyl, sealed concrete, and other hard surfaces.
When Standard Crutches May Not Be the Best Fit
Correctly sized crutches are not automatically the best mobility solution for every patient. Successful use requires hand strength, shoulder stability, coordination, balance, and the ability to follow a prescribed gait pattern. Some patients may be better served by a walker, knee walker, wheelchair, rollator, or another clinician-recommended option.
This decision is especially relevant for older adults with a fall history, patients with arthritis or upper-extremity pain, individuals with neurological conditions, and anyone recovering from a procedure that limits safe use of the arms. Bariatric patients may require equipment with an appropriate weight capacity and wider dimensions. Pediatric patients need a fit that accounts for growth, changing footwear, and close caregiver supervision.
If the patient’s condition, weight-bearing status, or home environment changes, reassess the mobility plan rather than trying to compensate with an awkward crutch adjustment. The right device is the one that supports the prescribed recovery plan while allowing the patient to move with the greatest practical safety and control.
A careful fitting takes only a few minutes, but it can prevent discomfort and reduce avoidable mobility problems. Before relying on any new pair of crutches, verify the height, handgrip position, hardware, and tip condition – then make sure the patient has clear instruction and a safe path for the next step.